


Tesla splitter shield repairs are necessary due to damage from road debris and minor collisions, compromising its structural integrity and aesthetic appeal. Professional assistance is recommended for accurate assessment and restoration of original specifications. Before attempting DIY repairs, gather genuine replacement parts and specialized tools, ensuring aesthetic accuracy and safety standards. This guide provides a step-by-step process for safe and effective Tesla splitter shield repair or replacement, emphasizing tool selection and debris removal for seamless fit.
Tesla owners often face the challenge of damaged splitter shields, a component that enhances both aesthetics and performance. This comprehensive guide tackles Tesla splitter shield repair, breaking down the process into manageable steps. We’ll first explore common causes of damage, then walk you through gathering essential tools and replacement parts. By the end, you’ll be equipped to restore your Tesla’s sleek profile and optimal performance with confidence.
- Understanding Tesla Splitter Shield Damage
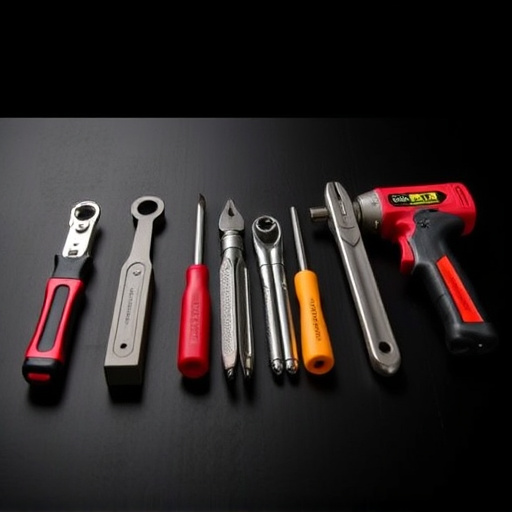
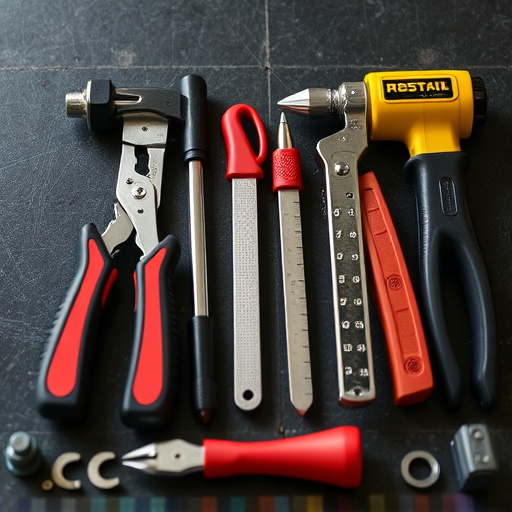
- Gather Tools and Replacement Parts
- Step-by-Step Repair Process
Understanding Tesla Splitter Shield Damage
Tesla Splitter Shield Damage: A Common Concern
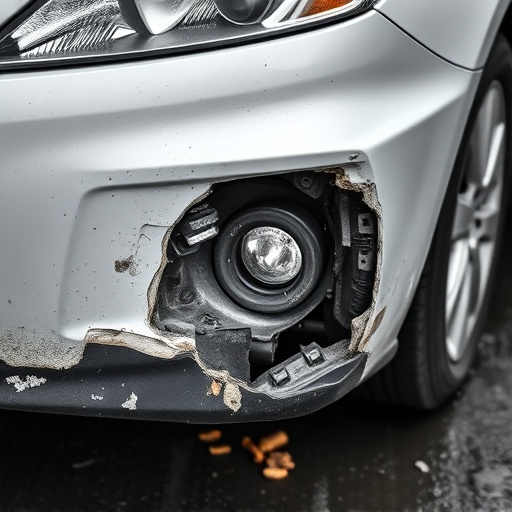
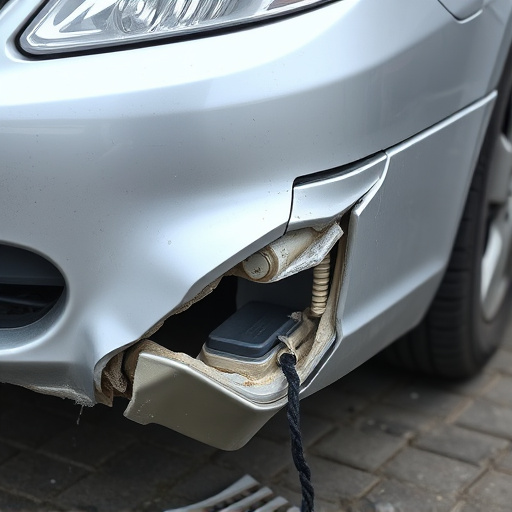
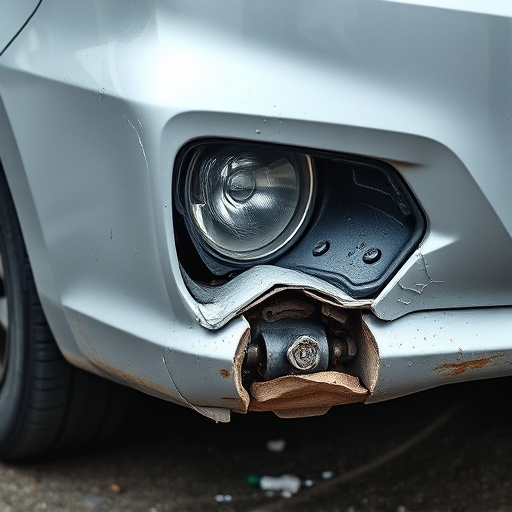
The Tesla splitter shield, a distinctive component of the vehicle’s front fascia, is often subjected to damage due to various reasons, including road debris impact, minor collisions, or even accidental scratches. This protective barrier plays a crucial role in enhancing the car’s aesthetic appeal and structural integrity. When the splitter shield sustains damage, it not only compromises its ability to deflect obstacles but also affects the overall look of the vehicle. Recognizing common issues like dents, cracks, or missing parts is the first step towards effective Tesla splitter shield repair.
Whether the damage is minor or extensive, considering professional assistance from a reputable car body shop or collision repair shop is advisable. Collision repair services specialize in restoring vehicles to their pre-accident condition, ensuring precision and longevity. With advanced tools and expertise, these shops can accurately assess the extent of the damage, perform necessary repairs or replacements, and recondition the splitter shield to its original specifications, ultimately preserving the Tesla’s sleek and modern appearance.
Gather Tools and Replacement Parts
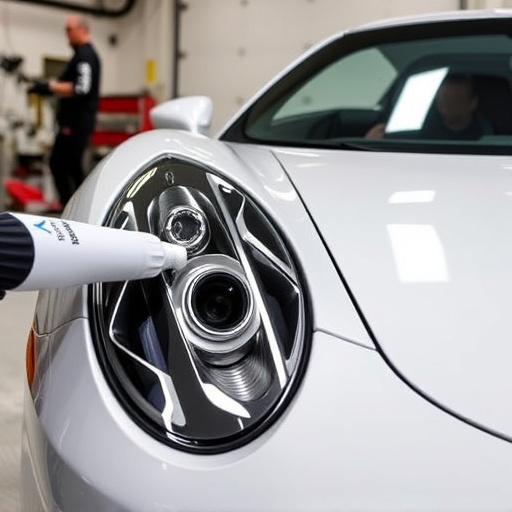
Before tackling any Tesla splitter shield repair, ensure you have all the necessary tools and replacement parts on hand. This includes a set of high-quality screwdrivers, pliers, and any specific tools designed for your Tesla model. For many owners, sourcing genuine Tesla replacement parts is crucial to maintaining the vehicle’s aesthetic and safety standards. Remember, proper installation requires precision, so consider consulting a professional auto body shop or owner’s manual if you’re unsure about the process.
Gathering the correct auto glass repair supplies is essential for a successful Tesla splitter shield repair job. This may include a new splitter shield, adhesive, and sealer, among other specialized materials. With these essentials in place, you can confidently embark on the repair process, knowing that your Tesla’s front end will be restored to its original condition or even improved, showcasing the vehicle’s unique design elements with pride.
Step-by-Step Repair Process
Tesla splitter shield repairs are a common necessity for Tesla owners, often arising from minor fender benders or curb strikes. The process involves several steps designed to ensure both functionality and aesthetic integrity of your vehicle’s front end. Here’s a step-by-step guide to help you with the repair:
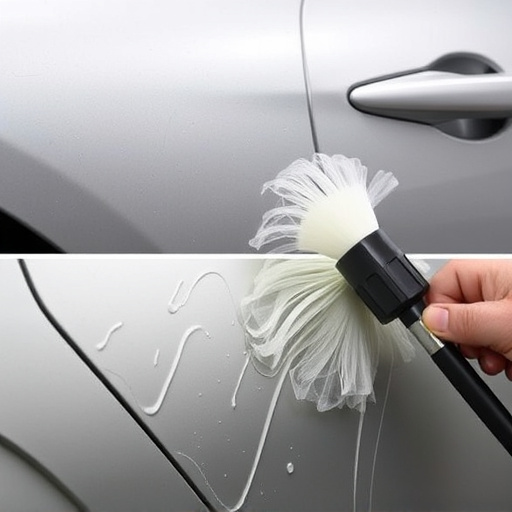
1. Safety First: Park your Tesla on a level surface, engage the parking brake, and make sure it’s cool to touch after any recent driving. Put on safety gear, including gloves and eye protection, as broken pieces can be sharp. Remove any debris or damage from around the splitter shield area using compressed air or a soft brush.
2. Remove the Splitter Shield: Using a socket wrench or screwdriver suitable for your Tesla model, carefully loosen and remove the screws securing the splitter shield in place. Some models may have additional fasteners or clips; ensure you identify and document their locations before removing them. Once removed, inspect the splitter shield, bumper, and surrounding components for damage.
3. Assess Damage: Determine the extent of the damage, which could range from a cracked plastic shield to more severe impacts affecting metal panels or trim pieces. For minor cracks or chips, you might opt for a DIY repair using specialized kits; for significant damage, professional auto maintenance or bumper repair is recommended.
4. Replace or Repair: If the splitter shield is beyond simple repairs, replace it with an OEM (Original Equipment Manufacturer) part for the best fit and finish. Ensure proper alignment during installation. For minor damage, use appropriate adhesives or repair kits designed for plastic and automotive applications.
5. Reassemble: Once the splitter shield is repaired or replaced, carefully reinstall it, ensuring all screws are securely fastened in their original positions. Double-check that all components are properly aligned and fit snugly.
Repairing your Tesla’s splitter shield doesn’t have to be a daunting task. By understanding common damage types, gathering the right tools and parts, and following a simple step-by-step guide, you can effectively restore your vehicle’s aesthetic appeal. With this DIY approach, you’ll not only save costs but also gain valuable knowledge for future maintenance. So, whether it’s a crack, dent, or loose connection, tackling Tesla splitter shield repair is within reach, ensuring your electric vehicle looks as good as new.